Example 1 (simple) |
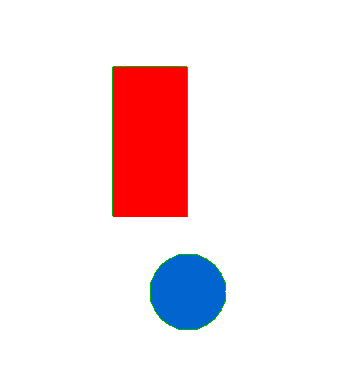 |
    // A simple example.

    // draw a red rectangle..
    fd 200
    rt 90  fd 100
    rt 90  fd 200
    logo fillcolor = "red"
    fillshape

    // move to where the circle will be..
    pu
    fd 100
    pd

    // draw a blue circle..
    circle 50
    logo fillcolor = "blue"
    fillshape
|
Example 2 (trax) |
 |
    message "Tiretracks.." "Stop"

    logo wrapedges yes

    rt 49

    repeat untilbreak [
      if keypress = yes [ break ]
      fd 30
      lt 60
      fd 30
      rt 60
      wait 1
      ]
|
Example 3 (yourname) |
 |
  set name = typein "Please enter your first name:" ""

  message "" "Stop"
  repeat untilbreak [
    if keypress = yes [ break ]
    logo textsize = calc( 6 + random 15)
    logo linecolor = randomcolor
    pu; moveto (random winwide) (random winhigh)
    sayc :name
    wait 10
    ]
|
Example 4 (cone) |
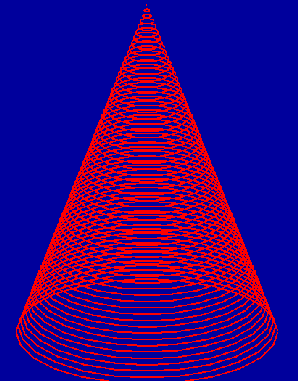 |
    logo backcolor = "darkblue"
    set pos = 700
    set size = 1
    logo linecolor = "red"
    pu
    repeat untilbreak [
      moveto center :pos
      pd
      ellipse :size (calc :size * 0.4)
      pu
      decr pos by 10
      incr size by 4
      if :pos < 100 [ break ]
      ]
|
Example 5 (pyramid) |
 |
    logo backcolor "darkblue"

     // draw the pyramid one "layer" at a time..
    set size = 1
    set pos = 600
    pu
    repeat 80 [
      moveto center :pos
      logo linecolor = "tan1"
      logo turtledir 290
      pd;  fd :size   pu

      moveto center :pos
      logo linecolor = "white"
      logo turtledir 70
      pd;  fd :size   pu

      // move down and make wider...
      decr pos by 6
      incr size by 5
      ]

     // now make a moon...
    pu; moveto 600 650
    pd; circle 50
    logo fillcolor = "white"
    fillshape
|
Example 6 (donut) |
 |
    pu
    lt 90
    fd 200
    rt 90
    repeat 72 [
      fd 20
      rt 5

      // set the ellipse rotate amount so it's
      // the same as the current turtle direction...
      logo circrotate turtledir

      pd
      ellipse 80 20
      pu
      wait 2
      ]
|
Example 7 (star1)
... an example of a TO procedure that can be invoked by other programs.
|
 |
// STAR1 - draw a five-pointed star.
// ptlen is the distance from center to end of a star point.
// rotate_amount  rotate star to given angle..  0 = straight up

to star1 :ptlen :rotate_amount

  set t1 = turtle  // save current turtle..
  logo turtledir :rotate_amount
  set sidelen = calc :ptlen * 0.8
  pu fd :ptlen pd   // move to top point..
  lt 160
 // now do the 5 points..
  repeat 5   [fd :sidelen rt 68 fd :sidelen lt 140]

  pu; logo turtle = :t1
  end

// execution begins here.. produce one star..
star1 100 0
|
Example 7a (starplenty)
This includes the star1 procedure (above) to draw each star..
|
 |
    include star1

    message "Stars aplenty.." "Stop"
    logo backcolor "black"
    clear

    logo linecolor = backcolor   // to hide star outlines

    repeat untilbreak [
      pu
      moveto (random winwide) (random winhigh)
      logo fillcolor = randomcolor
      star1 (random 40) 0
      fillshape
      if keypress = yes [ break ]
      wait 1
      ]
|
Example 7b (starpoint)
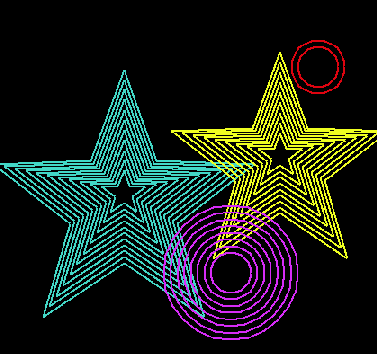
User clicks with mouse and makes concentric stars and circles.
This one also utilizes the star1 procedure (above).
|
 |
    include star1

    message "Click left for star.. right for circle." "Done"
    logo backcolor "black"
    pu

    repeat untilbreak [
       getkey
       if whichkey = "Done" [ break ]
       moveto whereclick
       logo linecolor = randomcolor
       set size = 30
       repeat (calc 1 + random 15) [
          if whichkey = "left"  [
            star1 :size 0
            incr size by 15
            ]
          elseif whichkey = "right" [
            pd; circle :size; pu
            incr :size by 10
            ]
          wait 10
          ]
       ]
|
Example 8 (pinkaliens)
A more involved example. Pink aliens are generated until user clicks on a [Stop] button.
|
 |
include landscape1
landscape1 400 5 20

message "Pink aliens.." "Stop"

// make the mothership..
pu; moveto 200 550;
logo fillcolor = "brightgreen"; pd; ellipse 120 30;
fillshape
pu; moveto 200 540;
logo fillcolor = "purple"; pd; ellipse 120 30;
fillshape

// now make aliens..
repeat untilbreak [
  if keypress = 1 [ break ]

// set a random location for each alien..
  set ypos = calc 100 + random 280
  set xpos = random winwide

// set alien size based on how "far away" it is..
  set origsize = calc 800 / :ypos
  set size = calc :origsize * 3

  logo linecolor = "powderblue"
  logo fillcolor = "pink"

// draw an alien.. (a stack of pink ellipses)
  repeat (calc 10 + random 10) [
    pu; moveto :xpos :ypos
    pd; ellipse (calc :size + random 8) (calc :size * 0.7)
    fillshape
    wait 5
    incr ypos by (calc :size * 1.1)
    set size = calc :size * 0.8
    pu
    ]
// add the antennae..
  set asize = calc :origsize * 4
  pd lt 35 fd :asize  bk :asize rt 70 fd :asize pu

  wait (calc 10 + random 60)   // wait a random amount of time..
  ]
|
Example 9 (tubes)
First, several random points are generated, then a curve is generated to fit
the points. All the points in the curve are captured, and at each point
an ellipse is generated. Each ellipse is rotated based on the current
pen direction at that point, giving the illusion of a tube.
|
 |
    logo linethick = 0.5
    logo backcolor = "black"

    repeat untilbreak [
      clear
      pointlist clearall

       // generate some random points..
      logo linecolor = "black"
      pointlist startcapture
      set npts = (calc 3 + (random 10))
      repeat :npts [
        moveto (calc 100 + (random 500)) (calc 100 + (random 500))
        pd
        ]
      pointlist endcapture

       // generate a curve to fit the points..
      pointlist startcapture
      pointlist curvefill
      pointlist endcapture

       // do a dotfill to even things out
      pointlist startcapture
      pointlist dotfill 10
      pointlist endcapture

       // now at each point, draw a small ellipse
       // rotated relative to the current turtle direction..
      set npts = pointlist size
      decr npts by 2   // omit 1st and last pts
      set i = 1
      logo linecolor = "brightgreen"
      repeat :npts [
        pu; moveto point :i; pd
        logo circrotate turtledir
        ellipse 30 12
        incr i by 1
        wait 1
        ]
      set k = buttonchoice "Tubes.." "Go again|Quit"
      if :k = "Quit" [ break ]
      ]
|
Some other examples without code |
fiberoptic |

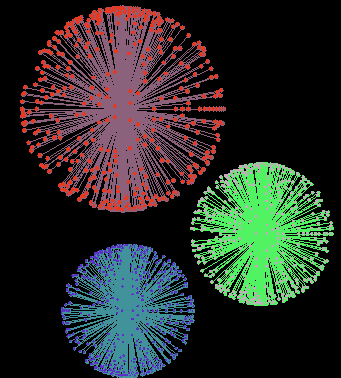
Simple drawings can be made using the mouse, then saved as pointlist files.
Then, several pointlist files can be loaded and displayed at different sizes.
|
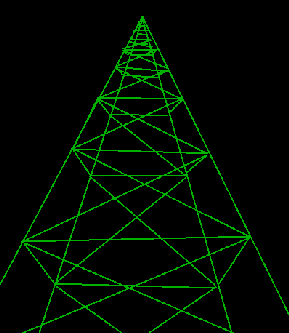
This is another drawing made by clicking the mouse, and saved as a pointlist file.
|
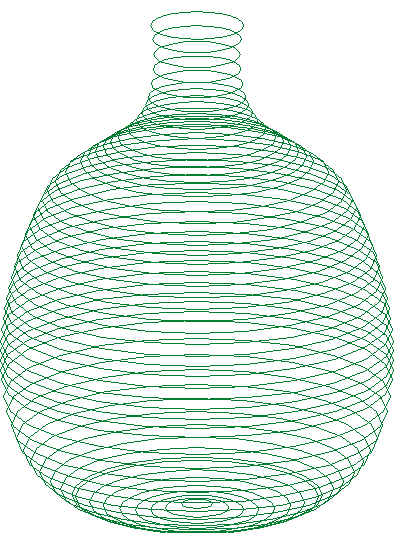
In this example ("pottery") user defines a few points with the mouse, then the shape is generated. |

cruiser .. this runs as an animation |

tree .. generated using recursive techniques |
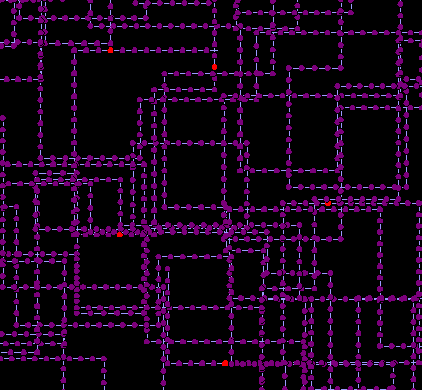
traffic .. this runs as an animation |


